Guides · 9 min read
Real estate photos that also work for video
Light, camera height, room order and file size for portals such as Idealista, plus what a photo needs before it can become a film. With examples from our two demos.
A good real estate photo is taken in daylight with every light on, the camera held level at chest height so the walls stay upright, in landscape, in a tidy room with nobody in it. For Idealista, a JPEG under 8 MB clears the lower of the two limits its help centre publishes. To work as raw material for a film as well, a photo needs three more things: at least 1920 × 1080 pixels, a set that covers exteriors, interiors and views, and a clean image with no watermark or collage.
Before you shoot
Light
Every light on, even at midday, the cooker hood included: Idealista’s own photography tutorial, a 2013 PDF that is still online, asks for exactly that. Lamps reach the corners the windows don’t.
Keep bright windows to one side or behind you, never straight ahead. Face one and either the window burns out or the room goes dark; if there’s no other angle, draw the curtains.
Outside, orientation comes before the time of day. The same tutorial recommends the middle of the day so the façade isn’t in shadow. For film we prefer low sun, which brings out texture and lengthens shadows, on one condition: it has to fall on the façade in shot. A west-facing house is an evening shoot; an east-facing one, a morning shoot.
Height and verticals
Chest height, camera level. The tutorial puts it as shooting at a natural height, with vertical lines kept vertical. Tilt up to fit the ceiling in and the walls lean backwards; step back or go wider instead. If the verticals still converge, straighten them with your editor’s perspective tool before sending the photo.
Framing and room order
One or two photos per space: spend five on the living room and you’ll have none left for the bathrooms. That’s the rule in Idealista’s tutorial, which also keeps one image back for the floor plan. Shoot from a corner so the depth reads, with doors and windows in frame and furniture facing the camera: the back of a sofa tells a buyer nothing about the room.
Order the set the way you’d walk a buyer round: arrival and façade, living spaces, kitchen, bedrooms, bathrooms, terraces and views, and the floor plan last. The first photo usually becomes the listing’s cover; for a villa, it should rarely be the hallway.
Preparation
Clear worktops, made beds, toilet lid down, personal belongings out of shot. No people (the tutorial’s line is that you’re photographing spaces, not people) and no cars on the drive. Watch for anything that gives the address away, such as house numbers or street names.
Size limits if you list on Idealista
The two pages of Idealista’s help centre that give figures set no minimum resolution. They cap file size and photo count, and they don’t agree (checked 27 September 2026):
| Idealista help page | Photos per listing | Maximum size per photo |
|---|---|---|
| Multimedia, updated 27 July 2026 | 180 | 32 MB (jpg, jpeg, png or gif) |
| Create a new property, updated 25 November 2025 | 200 | 8 MB |
Until Idealista settles it, export JPEGs under 8 MB, which satisfies both, and check the limit before a large upload. That 2013 tutorial talks about 40 photos at 650 pixels wide and 2 MB: its framing advice holds up, its numbers don’t.
Photo count matters. Idealista scores listing quality on seven factors (photos, description, video, floor plan, 3D or virtual tour, visible address and energy certificate) and expects more photos the bigger the home; its example is that a five-bedroom house needs more than a studio. The score affects where a listing appears in results, although Idealista says it isn’t the only factor.
Since 2 August 2026, Idealista has also put a visible label on photos generated or substantially edited with AI, such as renders, virtual staging or AI-enhanced shots. You can flag them on upload, and even if you don’t, Idealista may detect them through the file’s C2PA content credentials or its own detection model. A sky replaced with an AI tool may be enough to trigger the label; if you think it doesn’t apply, you can ask for a review.
Photos that work as raw material for a film
A film made with AI from photos inherits everything from them. The AI moves the camera across each image, but it knows nothing about what wasn’t photographed: if you want the kitchen in the film, we need a photo of the kitchen. And our retouching is limited to light, colour and sky; it doesn’t sharpen, straighten or remove anything in the frame. Hence the photo requirements for the film:
- Resolution and orientation. At least 1920 × 1080 pixels, landscape. A vertical phone photo (3:4) loses almost 60% of its height when it’s fitted into a 16:9 shot.
- Quantity and variety. Between 5 and 15 recent photos covering exteriors, interiors and views. The more variety, the more distinct shots: five photos of the pool make a film about the pool. If you have an elevated view, from a high terrace or an earlier drone flight, include it; that’s where the aerial-style shots come from.
- Nothing to distract. No people or cars where possible: whatever is in the photo ends up in the film.
- A clean image. No watermarks, logos, text, collages or screenshots. If a photographer took the pictures, ask for unmarked files and check that the commission covers use in video.
The film comes in 16:9 and, depending on the package, in 9:16 as well. What each channel expects is in our guide to video formats for portals and social.
This photo works, this one doesn’t: examples from our demos
Our two demos start from 4 and 5 photos. Here is each one next to the version that wouldn’t have worked:
| Source photo | Why it works | The version that wouldn’t |
|---|---|---|
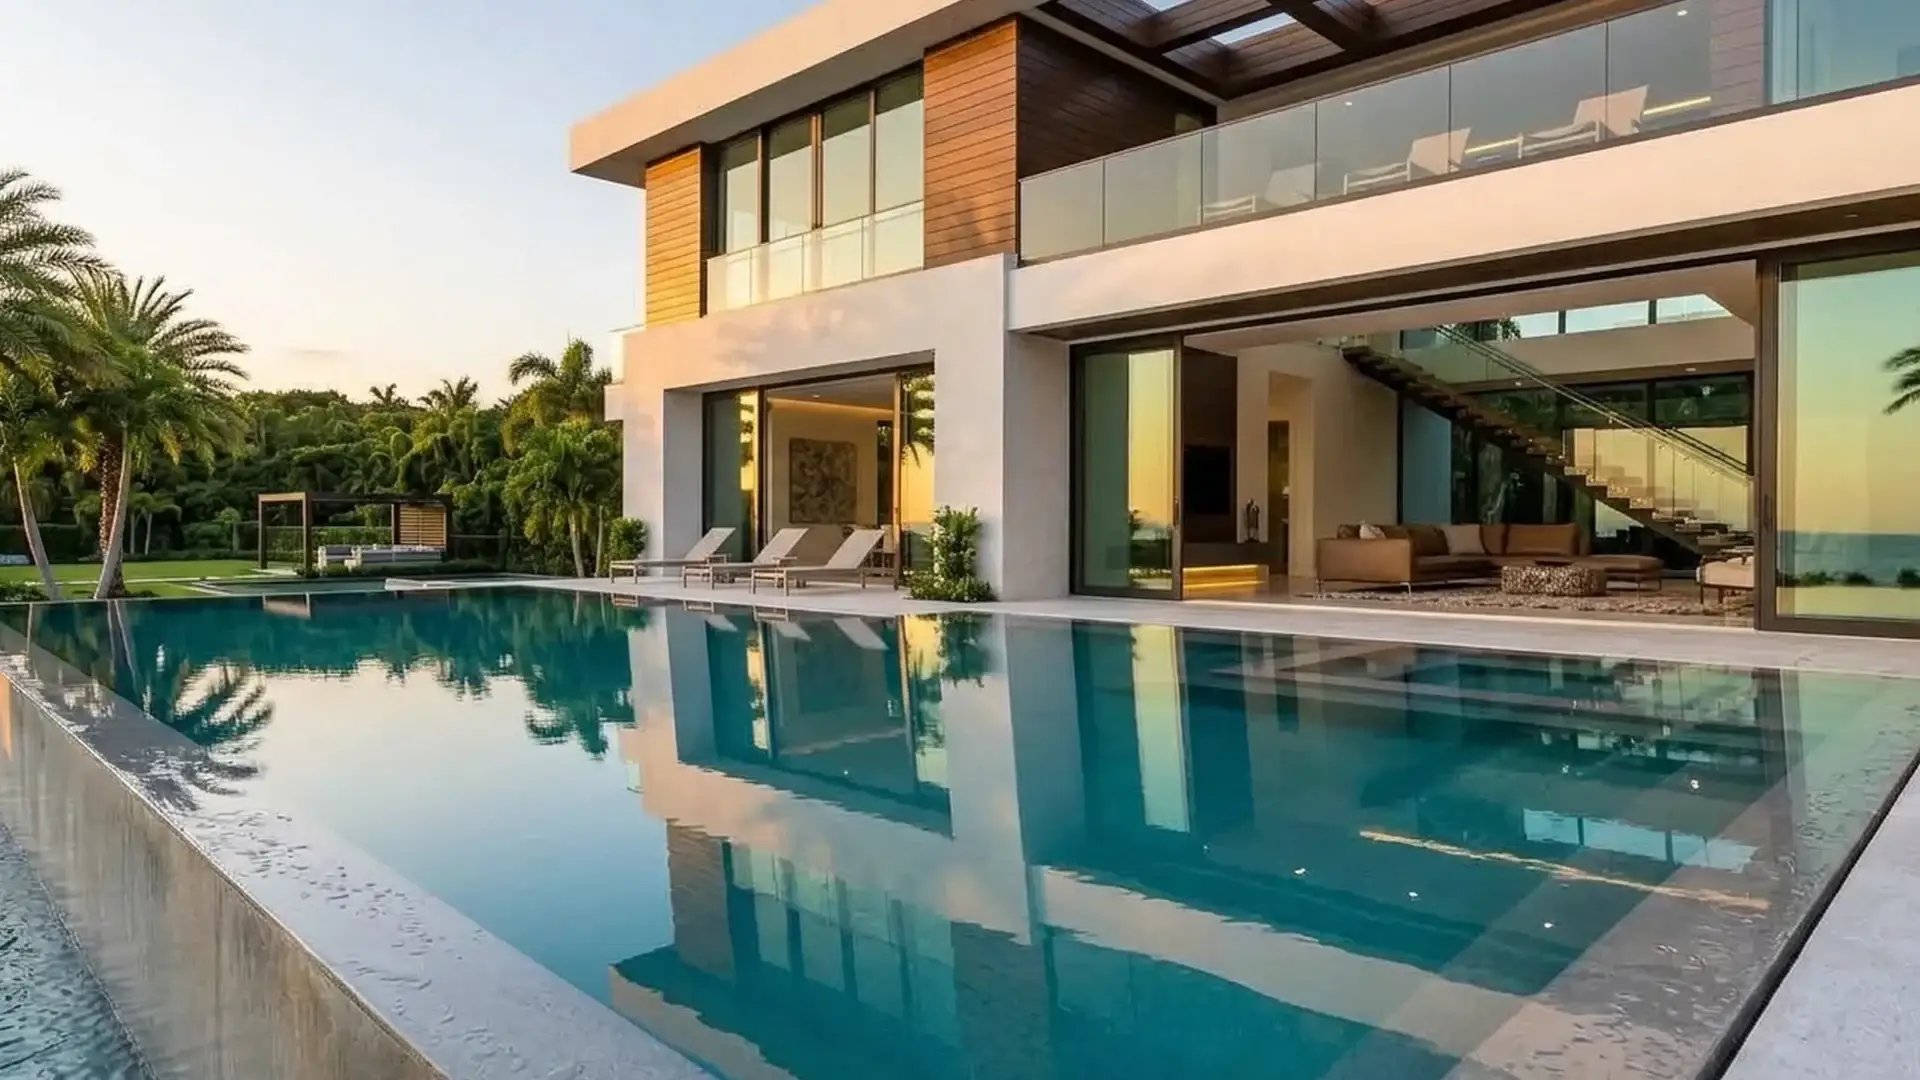
| Villa: infinity pool and façade | Low camera, almost at water level. The pool mirrors the façade and the open sliding doors show the living room: layers of depth for the camera to glide past. | The same pool from a balcony, looking down at midday: no reflection, no façade, just a blue rectangle. |
| Villa: upper deck with tennis court at dusk | A high vantage point that takes in court, pool, garden and sea, with the interior lights on to balance the sky. | The same view with the house dark: the glazing turns into black holes. |
| Villa: main entrance with palms and driveway | Square-on façade, straight verticals and a curved drive that leads the eye to the door. | The same shot with the car parked in front of the door rather than off to one side (see the note below). |
| Villa and estate: the two aerial views | Existing aerial photos showing the whole plot and its setting. In both films, the final aerial shot comes from these photos. | A screenshot from a satellite viewer: too little resolution, and an image that isn’t yours. |
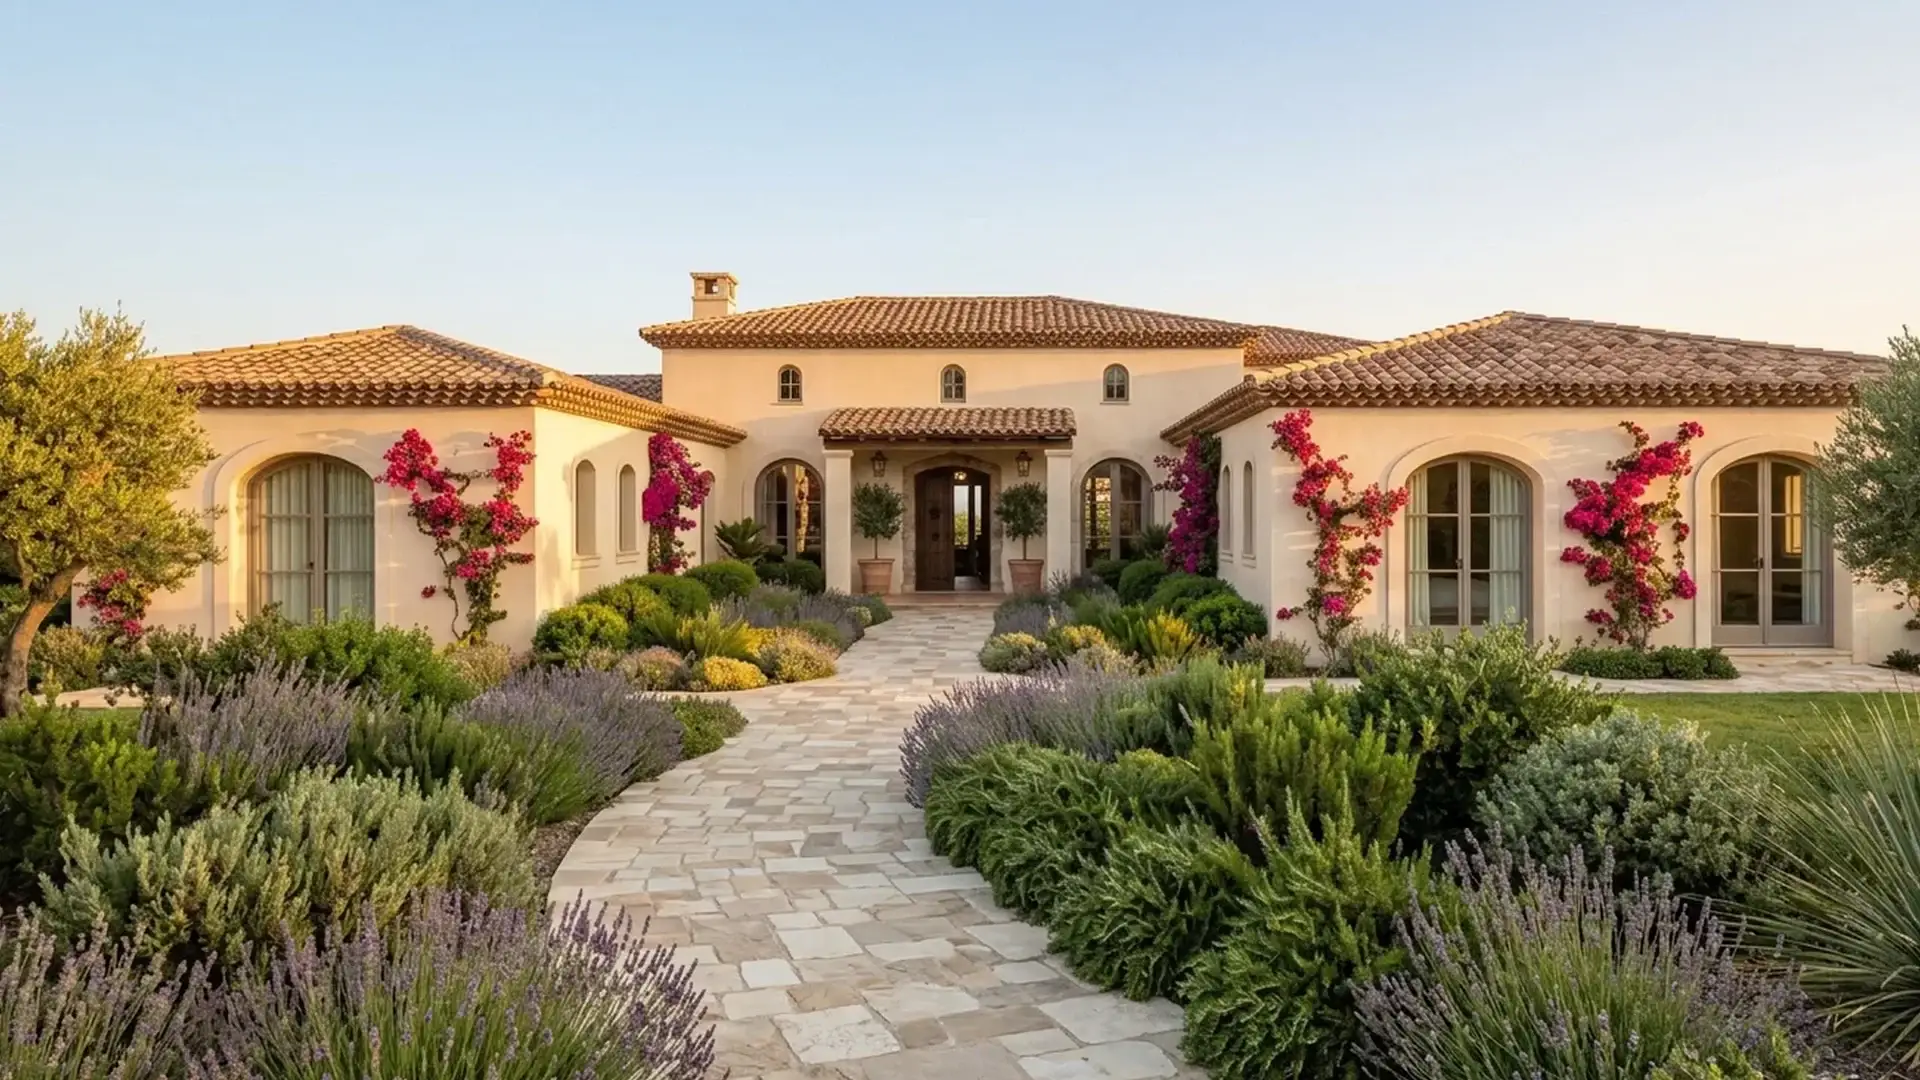
| Estate: stone path through the lavender | Square-on and symmetrical. The path leads the eye to the door and gives the camera somewhere to move towards. | The same entrance shot at an angle with the phone tilted up: walls leaning backwards. |
| Estate: arched porch and solid wood door | Square-on, at a natural height, with the stone, timber and terracotta well lit. | The same photo with the photographer’s watermark: retouching won’t remove it, so it would sit in every frame. |
| Estate: stone pool with loungers and cypresses | Symmetry, a vanishing point at the pergola and loungers in the foreground for depth. | A collage of four pool views in one file: to the AI it’s a single image with no space to move through. |
| Estate: living room with fireplace and beams | Shot from a corner with the windows to one side: you can see the olive trees through the glass and the room isn’t dark. | The same room shot facing the windows: the outside burns white and the room sinks into shadow. |
A note on the villa entrance. There’s a black 4×4 parked at the left edge of that photo. In the film it appears at the start of the shot and almost leaves the frame as the camera moves towards the door. We didn’t remove it, because our retouching doesn’t remove anything. That’s why we ask for photos without cars wherever possible.
The checklist
For the listing:
- Daylight, with every light on.
- Windows to the side or behind you, never straight ahead.
- Camera at chest height and level; verticals straight.
- Landscape.
- One or two photos per room, plus façade, outdoor spaces, views and floor plan, in the order of a viewing.
- Tidy rooms, no people, no cars and no house numbers in shot.
- JPEGs under 8 MB for Idealista.
- Photos generated or substantially edited with AI flagged on upload.
And for the film:
- Between 5 and 15 recent photos.
- 1920 × 1080 pixels or more.
- Exteriors, interiors and, if you have one, a view from a high point.
- No watermarks, logos, text or collages.
- Original files, not copies forwarded through a messaging app.
Will your photos work?
The quickest way to find out is to try one property. Send us your photos for a demo and you’ll have the film within 72 hours, free and with no commitment. If a photo doesn’t work, we’ll tell you why.
Frequently asked questions
What are the photo requirements for an AI property film?
What kind of images can be turned into a film?
Which photos should I animate?
How many photos should a property listing have?
What resolution should listing photos be?
Can I take real estate photos with a phone?
Sources
- Idealista help centre for professionals: ‘Multimedia idealista: enriquece tus anuncios’ (Spanish), updated 27 July 2026 (checked 27 September 2026)
- Idealista help centre for professionals: ‘Crear un nuevo inmueble’ (Spanish), updated 25 November 2025 (checked 27 September 2026)
- Idealista help centre for professionals: ‘Calidad de los anuncios’ (Spanish), updated 25 November 2025 (checked 27 September 2026)
- Idealista help centre for professionals: ‘Identificación de fotos editadas con IA’ (Spanish), updated 27 July 2026 (checked 27 September 2026)
- Idealista: ‘Tutorial de fotografía y vídeo’ (Spanish PDF, 2013; checked 27 September 2026)